Showing posts with label Pretty Punches. Show all posts

September 30, 2010

Christmas Stocking Stuffers

Hi everyone. Today I thought I'd share a little project from the catalogue launch party I had earlier this month. I know it seems too early to think about Christmas, but when I went shopping last night the Christmas decorations and candy were out in force! I guess it's because the retailers in New Zealand don't have to focus on Halloween and Thanksgiving.

These little boxes have just a few elements but would be  perfect for putting a little gift or candy in for stocking stuffers or add a ribbon loop and hang them from the tree! With just a few steps you can go from this...
to this....
The colour combo for this project is Wild Wasabi, Bravo Burgundy and Very Vanilla. This is a really elegant combo for Christmas, a little different from the usual bright red based combos.

The Pillow Box die cut is simply decorated with a strip of Wild Wasabi paper, some Bravo Burgundy Ribbon and a bird from the Two-Step Bird punch. The sentiment is from the new Contempo Christmas set - I love that sentiment!


Stamps: Contempo Christmas
Paper & Card: Bravo Burgundy, Wild Wasabi DP, Very Vanilla
Ink: Bravo Burgundy, Wild Wasabi
Punches:
Two-Step Bird, Square
Big Shot: Pillow Box Die
Other:
Bravo Burgundy Ribbon

September 28, 2010

Clear Sleeve Gift Box & Zippy Wallet


Hi everyone - I have a couple of fun things to share today, a great sewing tutorial link and a gift box! This is my last week hostessing the Project Tuesday challenges and it's been a blast. This week we're making my clear sleeve gift boxes - the basic instructions are in this post here. They are really simple though - I always make my base box then just wrap the acetate around the box to make the slip cover - no measuring required.

For my box today I kept it pretty simple. Ribbon bands around the edges of the slip cover and a label decorated with paper flowers.

The largest flower is simple Scalloped Circle punches from designer paper that I wet & scrunched up before moulding the flower shape. I sprayed the flower with Glimmermist to disguise the white edges. Once the flower dries it's nice and sturdy, perfect for decorating a box.

I was making this box specifically for the gift that's inside....


So I matched the colours to the little purse. I've used Crumb Cake (stamped with the old Linen background in Crumb Cake ink to match the linen fabric) Regal Rose and Rose Red. That's a Rose Red button on the purse - love those marbled buttons! 

The purse comes from this wonderful tutorial by Anna from Noodlehead. This is my fifth sewing project and the second of these little purses I've made - Anna's tutorials have been instrumental in my getting to grips with zips! (say that three times fast!)
The purse is fully lined which I love - it gives such a nice finished quality. I also pulled out the beading supplies and fashioned a little glass and Tibetan silver zipper pull for that extra bit of bling!

I hope you'll join me and the rest of the design team in making Clear Sleeve Gift Boxes for Project Tuesday this week!


Stamps: Afterthoughts (hostess), Linen Background
Paper & Card:
Crumb Cake, Whisper White, Rose Red
Ink:
Crumb Cake, Regal Rose
Punches:
Scalloped Circle Punch
Other:
Regla Rose Ribbon, Soft Subtles Brads

Other: Prima Flowers, Nestabilities, Brads, Flower Button, Glimmermist

April 29, 2010

OCC Sketch #13

Thursday means it's time for another great OCC Sketch! This week's sketch was SO fun, and I knew what I wanted to do with it right away.

Immediately I saw this sketch as a great little treat bag cover. I make these a lot and pretty much always use an oval window and a scalloped edge for the flap!

This is probably the largest I've ever made one of these - it measures 4 1/4" by almost 5". I don't think you can tell from the photo, but there's a medium SU! cello bag inside the cover. I love using the double sided specialty cardstock - when the cello bag is empty it's nice to see the pattern on the inside.

The jumbo eyelets are set on the front layer only, the ribbon keeps this closed - it can be reused again and again.

The sentiment and top bird are on a tag that loops over the ribbon and can be easily removed without damaging the cover or even placed on another project.

Here it is, full of embellishment goodies for a special friend!

Head on over to the OCC Sketch blog to see the wonderful design team creations and link your card based on this weeks sketch.


Stamps:
Teeny Tiny Sentiments
Paper & Card: Baja Breeze, Certainly Celery & Very Vanilla Card
Sweet Slumber Specialty DP
Ink:
Riding Hood Red, Apricot Appeal
Punches: Small & Large Tag, Word Window & Two Step Bird Punch
Other: Apricot Appeal Ribbon & Brad, Linen Thread, Jumbo Eyelets, Crop-a-dile, Sponge Daubers, Medium Cello Bag

E-mail me to purchase.

Other:
Colluzle Template (scalloped edge), Oval Nestabilities

April 9, 2010

Yum Book!

Good morning! It's nice and early here in NZ, the sun is shining, it's going to be a lovely day. Before I get stuck into something creative I thought I'd share a project I whipped up as part of Shanan's anniversary present - I'm calling it a "Yum Book"!

It's SO hard to craft presents for guys sometimes. This is a quick and simple way to make something a little goofy but fun for the man in your life. WARNING - this post is predicated on both you liking to cook for hubby, and him liking your cooking *wink*

I printed off a bunch of coupons I made in Microsoft Publisher. I think there is 16 total. Shanan loves brunch in the weekends and baking anytime - so I've included all his favs. Rather than stamping the coupons (I said this was a quick project) I decorated them very simply with a little piece of Urban Garden DP in the margin. The coupons are perforated using the little tool on the Cutter Kit.

I've used the Crop-a-Dile to punch holes through the coupons and cover and put it all together with a couple of rings. I've used more Urban Garden DP, crimping some with my underused but loved Crimper. I used the Wild West Alphabet to stamp the sentiment. The stamping on the medallion is a stamp from the Wanted set.

Shanan loved this! There are SO many things you could do with a gift like this. It's school holidays here in NZ at the moment, and this would be perfect for outings or activities to do with kids.


Stamps: Wanted, Wild West Alphabet
Paper & Card: Not Quite Navy, Kiwi Kiss & Whisper White Card
Urban Garden DP
Ink: Kiwi Kiss, Not Quite Navy
Punches: Scallop Circle, Small Star & 1" Circle Punch
Other: Hemp Twine, Old Olive Brad, Crimper, Dimensionals, Crop-a-Dile
E-mail me to purchase.

April 7, 2010

Sweet Treat Cups - Not Just for Kids!

I can't believe it's taken this long to share a project using the Sweet Treat Cups! But today I thought I'd do just that. I'm so glad the Sweet Treat cups and matching punch stuck around in our new mini catalogue, they really are fun to use. This is a card I made over the Easter weekend - I don't make a lot of children's cards - so it's nice to use these cups on something a bit more grown up - even when they are still filled with candy!
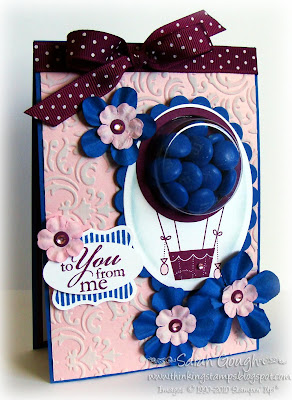
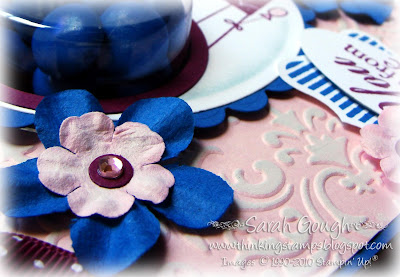
The sketch and colour combo for this card are mine - the colours are Pacific Point (perfectly matches blue M&M's!) Pink Pirouette and Rich Razzleberry. I haven't used any DP, so this qualifies for the Allsorts 46 Challenge.

The background layer is embossed and brayered with White Craft ink. The frame around the cup is cut with the Circle Scissor Plus.

I love the hot air balloon image - it's from a new set called A Little Treat - and it's my first Clear Mount stamp set! I LOVE the clear mount additions to the catalogue - I am desperately out of space for storing my sets and love that these come in DVD cases. Even better, it's the same red rubber we know and love - no sacrifices in image quality! I have to admit, I have had this set sitting on my desk uninked for a month - that's why you're not seeing it till now - but I'm totally convinced, it's unmounted for me from now on.
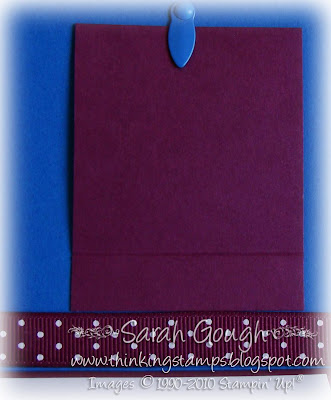
I've punched the hole for my cup through every layer on my card. Inside there's this little trap door that opens to get the candy out. I like using these photo anchors to close the trapdoor - I have a bunch of them, and luckily had one in just the right colour!
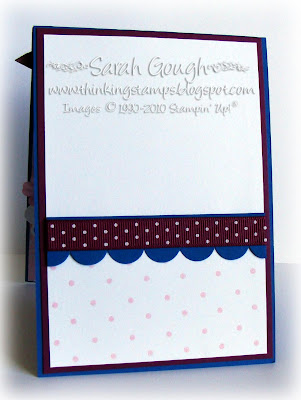
The inside of this card is really plain - I'll stamp a sentiment when the time comes to use the card.
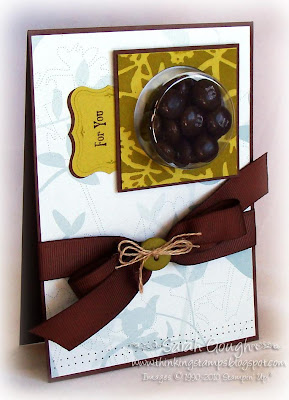
Here's a more masculine version of a Sweet Treat card - I made this one for Shanan back in February and slipped it into his messenger bag so he'd find it at work. I haven't used a matching stamp set on this one - instead the cup is just sitting in a little frame. I find I like the effect a lot more when I separate the colours of the candy like this....and it means you get to snack on the leftovers as you work!

Stamps: A Little Treat, Polka Dot Background, Best Yet, Cute & Curly
Paper & Card: Pacific Point, Rich Razzleberry, Whisper White, Pink Pirouette
Ink: Rich Razzleberry, Soft Sky, Pacific Point, Pink Pirouette, White Craft
Punches: Curly Label, Large Oval & 1 3/4" Circle Punches
Other: Circle Scissor Plus, Brayer, Rich Razzleberry Ribbon, Sweet Treat Cup
E-mail me to purchase.

Other:
Jamara Embossing Folder, Oval Nestabilities, Photo Anchor & Brad, Prima Flowers, Pink Rhinestones

April 6, 2010

Project Tuesday: Diaper Fold Pouch

It's time for another awesome Project Tuesday challenge! This week Rose has asked us to create a Diaper Fold Pouch. I love getting to create all these things I've been meaning to try for years!

This is a great project, because all you need is a square of paper. I started with a 8" square.

You can use these pouches as a base for a pull-out card or tag or as gift wrapping, I've filled mine with a bag of chocolate.

I stamped the scalloped circle image from Vintage Labels and punched my tag so just the top of the circle was showing. A simple sentiment and some pearls from the Pretties Kit finished this off.

I've used the Dahlia Fold for my large accent. The Pretties Kit pearl is mounted inside a Build-a-Brad.

Head on over to Project Tuesday to see the fantastic Design Team creations and to link your own Diaper Fold Pouch so we can all take a peek!


Stamps: Vintage Labels
Paper & Card: Taken With Teal, Very Vanilla card
Ink: Taken with Teal
Punches: Small & Large Tag & 1 3/8" Circle punches
Other: Pretties Kit, Mini Glue Dots, Chocolate Chip Satin Ribbon, Linen Thread, Build-a-Brad
E-mail me to purchase.

Paper & Card: Together Stripe DP - Chatterbox

April 3, 2010

OCC: It's all about Buttons Baby!

Hi everyone! I hope your Easter break is going well so far. I have some exciting news to share with you today - I'm now a member of the fabulous Our Creative Corner challenge design team!!! OCC have an amazing team and fantastic challenges every week. I've been bursting to share the news - and I'm so glad I can finally share my first OCC project (as part of the team) with you!

Today the challenge is to use buttons on your creation. I chose my buttons first and designed my project around them...

This was one of those cards that was just a delight to make, it almost put itself together! I originally intended to use the Top Note as a layer on a card, but it evolved into this shaped card goodness that I love.

I cut windows in the Top Note using nesties, and layered behind smaller windows and a scalloped strip to frame my image. The houndstooth layer is embossed and inked with a brayer. The flowers and butterfly are hand cut.

The front panel of the card is adhered to a folded Top Note card base, this way you get the full shape to work with and the card can be opened right up....

....without bending anything you don't want to bend. The colour combo for this card was Real Red, Tempting Turquoise and Kiwi Kiss.

Head on over to OCC to see the amazing design team creations, welcome Diane and Julie to the team as well and to link up your project featuring buttons!


Stamps: Polka Dot Background
Paper & Card:
Whisper White, Tempting Turquoise, Real Red & Kiwi Kiss.
Ink: Tempting Turquoise, Real Red & Kiwi Kiss
Punches: Scalloped Edge, Large Oval & Scalloped Oval Punches
Big Shot: Top Note Die
Other: Playground Buttons, Dimensionals,
E-mail me to purchase.

Stamps: Petals & Stems - Verve
Other: Polka Dot Ribbon - Rosie's Studio, Oval & Rectangle Nestabilities

March 19, 2010

Tangerine Tiger (ok, so it's really a cat!)

Good morning everyone! I'm posting nice and early today - I've been up since 6am because today is one of the best sporting days of the year - the start of the NCAA tourney (go Pitt!) I have a long day of basketball and crafting planned and couldn't think of a better way to spend the day. I know a lot of you in North America probably have hubbies glued to the TV, so hopefully you're getting lots of crafting done too!

This is a card I made a few weeks ago - an attempt to use a little of my Tangerine Tango cardstock! The colour combo I came up with is Tangerine Tango, Rose Red and Certainly Celery.

I love that little cat from the Pun Fun set. I've created the large scalloped strip using the Slit Punch.

This was actually the first card I created where I realised how perfectly the jumbo brads fit into the smaller grommets - love this effect!


Stamps: Pun Fun
Paper & Card: Tangerine Tango, Certainly Celery, Rose Red
Ink: Tangerine Tango, Stazon
Punches: Scalloped Circle, Circle & Slit Punches
Other: Brayer, Flower Fusion Felt Flowers, Jumbo Brads, Small Grommets,
Certainly Celery Ribbon, Silver Cord, Earth Elements Buttons, Soft Subtles Brads
E-mail me to purchase.


Other: D'vine Swirl Cuttlebug Folder