 While laying awake a few nights ago I decided I wanted to make a clear-top gift box. Something simple that could be embellished prettily. This morning I pulled out the stamps I wanted to use, grabbed some paper and luckily remembered to take photos! Here's how you can make one too.
 Start with a square of cardstock. I've used Close to Cocoa. Mine is 6x6" but you can use any size you want. Score all four sides at the height you need. I scored at 1 inch.
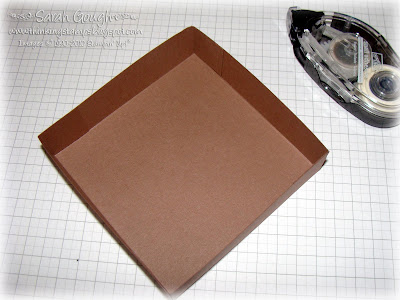
Snip each side as shown. Pre-fold all your score lines. If you are going to stamp your box base, now is the time to do it.
 Using some adhesive on the inside of the tabs, stick your box together. Simple right? I've made teeny tiny boxes this way or quite large ones. You could repeat the process with a slightly larger square to make a lid....or carry on as I did...
 Decorate your box base (if you didn't pre-stamp it). I used strips of Outlaw (retired) designer paper and sponged with Creamy Caramel and Close to Cocoa ink.
 Cut a strip of acetate (overhead transparency) the same width as your box (mine is 4 inches). You can also use patterned paper for this step, or try vellum for a lovely semi-opaque effect.
Score your sleeve four times according to the height of your box sides. Make sure to score a little larger than the height of each side of your box so it will fit over your base. Adhere together with Sticky Strip. You can stop here or dip into your ribbon stash and adhere a length on each side of the sleeve, again with Sticky Strip. I used Chocolate Chip narrow grosgrain.
 Time to embellish! I used a gorgeous stamp from the Oval All set, along with the Large Oval and Scallop Oval punches. The card stock is Sage Shadow and the ink is Chocolate Chip. The pearls and flower are from the Pretties kit and I used glue dots to adhere these to the acetate.
I waited until I had assembled my sleeve to use a rub-on so I could place it exactly where I wanted it - just place the rub-on on your sleeve, then turn upside down and rub on the inside of the sleeve to avoid misshaping it.
I made a tag by stamping an initial using the Wild West alphabet and punching it out using the Curly Label punch. Layer this on more Close to Cocoa card stock and cut around to get a nice border. A jumbo eyelet and hemp twine finish off your tag. Some more sponging - a bit of piercing and I was done!
I love packaging homemade and store bought gifts in boxes I've made myself - it really adds something special (and of course I can make a card to match!)
Have a creative day,
Supplies available from Stampin' Up!


