October 31, 2010

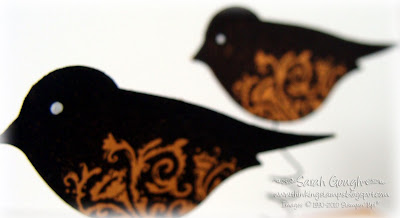
Bouncing Birdie Box

Happy Halloween everyone! Halloween certainly isn't as big a deal here in New Zealand as it is elsewhere - but I'll take any excuse to do some cute crafting!

Along with the Big Shot Shanan bought me for my birthday, I got the Box #2 die - which I love. Here I've used it to create what I call my Bouncing Birdie Box!
I stamped the box with a small polka dot stamp from the Sweet Sampler set. I've used Peach Parfait as my background colour for a slightly less bright Halloween colour combo. I added some white dots with a gel pen around the polka dots.

The birds were stamped, punched out then layered with another punched bird with a length of craft wire between them. The wire is twisted around a pencil to create a spring, which is punched through the top of the box (and secured on the underside with tape) Add a gorgeous satin bow and a sentiment and you're done!


Stamps: Teeny Tiny Sentiments, Sweet Sampler, Punch Potpourri
Paper & Card: Peach Parfait, Basic Black
Ink:
Basic Black
Punches:
Word Window, Modern Label, Two-Step Bird
Big Shot: Box #2
Other:
Black Satin Ribbon, White Gel Pen, Dimensionals

October 27, 2010

Simple Treat Topper

There are so many gorgeous bags and boxes around in blog land right now - most of them with a Halloween twist (I have one to share soon). Last night I opened a big parcel of goodies and just had to stamp a little, you know, just to try stuff out! so I threw together this cute little bag topper.


I used a medium cello bag filled with jumbo jelly beans for my treat. The colours on the topper are Tempting Turquoise and Concord Crush (love these together!) in real life the felt rose is closest to Rose Red
 
Paper & Card: Tempting Turquoise, Whisper White
Ink: Tempting Turquoise, Concord Crush
Other: Medium Cello Bags


Stamps: Polka Dot Greetings - MFT Stamps
Other: Felt, Jumbo Scallop, Rolled Rose & Polka Dot Greetings Die-namics - MFT, Jumbo Brads, Rhinestones

October 26, 2010

Christmas Tag Box

Hi everyone - Happy Tuesday! we have a fun Project Tuesday challenge for you this week - we're making these gorgeous tag boxes. These make a wonderful gift, or make one for yourself to get a jumpstart on your holiday crafting!

If you'd like to make your own box, you can find the tutorial here.
The colour combo for my box came from the Ski Slope paper I've used around the belly band - it's Real Red, Old Olive, Chocolate Chip and Baja Breeze.
Inside the box I have 12 tags, 3 each of four different designs. I've used a BUNCH of stamp sets on these, I won't list them all as many are retired, hostess or Sale-a-bration sets. You will see the ornament from Contempo Christmas in there though, love that set!

Here are all the individual tags - each one is made up of two components joined with silver cord.


If you play along this week, don't forget to link your entry at Project Tuesday - while there you'll see the pretty design team ideas for this box!

If you're in New Zealand and love (like I do!) the ribbon I used on my box, you can now get it free with the Dress Up Christmas promotion. Email me  for more info (flyer on the lefthand sidebar) or to get yours! 

Stamps: Assorted SU! sets
Paper & Card: Real Red, Old Olive, Baja Breeze, Whisper White, Ski Slope DP
Ink: Real Red, Old Olive, Baja Breeze
Punches: Curly Label, Scallop Edge, Tag, Scallop Circle, Designer Label & 1" Circle punches
Other: Real Red Polka Dot Ribbon, Baja Breeze Button, Silver Cord, Crop-a-dile

October 23, 2010

Cute Quickie

Hey everyone! It's time for another OCC Challenge, this week Diane has given us a gorgeous colour combo. This one's perfect for Halloween if you're so inclined, but I used it for a super quick, super cute clean & simple card based on the FTL 113 sketch.

Some pretty papers, square punches and a gorgeous sentiment.....I love this colour block look, especially offset by the curly sentiment font. I've embossed a few lines under the squares, they're just not showing in the photo.

Head on over to the OCC blog and check out the gorgeous cards the design team made this week!


Stamps: Occasional Quotes
Paper & Card: Whisper White, Pumpkin Pie, Rich Razzleberry, Certainly Celery, Assorted Designer Paper packs
Ink: Early Espresso
Punches: Square Punches

October 22, 2010

Time to Bloom

Good morning! It's dawned cold and rainy here in Wellington, good thing I have an assignment that needs doing - we're heading into a long weekend here in NZ, fingers crossed for some decent weather then!

This month is Breast Cancer Awareness month. As part of the Hope You Can Cling To card drive at SCS, MFT Stamps had a challenge to create a card for the drive, using die cuts. This is what I came up with and sent all the way to Texas.
I coloured the image with SU! markers and a waterbrush, paper piecing the dress. The watering can got a coat of Crystal Effects to make it nice and shiny. Her hair accessories got the Stickles treatment. I used the Jumbo Scallops to suggest ground. The papers are from one of my favourite packs of all time, Bella Rose.

I finished off the inside of the card with a sweet, general sentiment and more scallops. The colour combo for this card came right from the paper, Chocolate Chip, Kiwi Kiss, Riding Hood Red and Pink Pirouette.

I was lucky enough to win a $50 gift certificate for participating in the card drive (so expect to see some new goodies soon!) which reminds me.....


Random.org picked comment #10 for the CSN giveaway - congrats B. Roberts - I'll be emailing with the details on claiming your prize!

The card drive is ongoing, you can visit SCS here for all the amazing challenges, inspiration and the chance to win some awesome prizes while making someones life just that little bit brighter!


Paper & Card: Chocolate Chip, Whisper White, Kiwi Kiss, Riding Hood Red
Bella Rose Designer Paper Ink: Assorted SU! Markers
Punches: Circle Punches
Other: Chocolate Chip Grosgrain Ribbon, Pretty in Pink Button, Hemp Twine, Crystal Effects 
Stamps: Blooming Good Day, Green Thumb - MFT Stamps
Other: Jumbo Scallop Die-namics - MFT, Jumbo Brads - Basic Grey, Red Stickles

October 20, 2010

Masculine Mini

Hi everyone, thanks for stopping by! Today I wanted to share a cute little (4" square) card I made for this week's WSC challenge - to make a masculine card.
 90% of my cards are really girly, so it's nice to make a "guy card". I like to use a lot of texture on masculine cards, and usually stick to a sentiment as the focal image. I've used textured cardstock on this one, as well as embossing a panel which I then brayered with white ink. The brads have been in my stash for years and years and the wooden button recently came home with me in a pack from a discount store. I've added some (not very straight!) stitching ala Joanne. I need some practice!
Inside I've gone with the same scrappy look - such a good way to get rid of little bits and pieces of paper.


Paper & Card: Crumb Cake, Chocolate Chip, Marina Mist, Notebook DP 
Ink: Marina Mist, Chocolate Chip
Punches: Spiral Edge, Small Star, 1/2" Circle
Other: Crumb Cake Taffeta Ribbon

Stamps: Clearly Sentimental about Books - MFT Stamps
Punches: Upper Crest - Fiskars
Other: Wooden Button, Brads, Houndstooth Embossing Folder

October 19, 2010

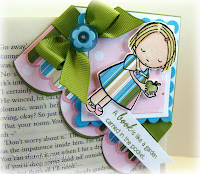
Corner Bookmark

Hi everyone and Happy Tuesday! The team at Project Tuesday have a fun challenge this week - Corner Bookmarks. I've had this on my "must-make" list forever, and I'm happy to report they are simple to make and so much fun to decorate. You can find a tutorial here.

I used various punches and dies to create the layers for my bookmark. The image was coloured on watercolour paper with SU! markers.

The paper is an oldie, Petals and Paisleys and the colour combo is Tempting Turquoise, Old Olive & Pretty in Pink.

These really are fun to make and embellish - not only that, they work really well too!

I hope you'll stop by the Project Tuesday blog to see what the other designers have come up with and to link your own creation!


Paper & Card: Tempting Turquoise, Old Olive & Whisper White. Petals & Paisleys DP.
Ink: Old Olive
Punches: Scallop Border punch
Other: Old Olive Ribbon, Playground Buttons, Linen Thread, SU! Markers

Stamps: Apple For You, Clearly Sentimental About Books - MFT Stamps
Other: Jumbo Scallop Die-namic - MFT Stamps

Challenge: Tip Top Tuesday

October 18, 2010

A Different Kind of Challenge...

I have a confession - I'm a messy stamper, and yup, I might be a bit of a hoarder. I keep lots of paper scraps, knowing I'll use them with punches or die cuts or for paper piecing. I make a terrible mess whenever I craft, then have almost as much fun putting everything away, ready for next time. There's something so inspiring about a clean workspace isn't there? It just calls to be messed up!

The problem is.....I had a ever growing stack of one kind of supply - cardstock. Toward the end of last week I finally got sick of the cluttered piles littering my craft room. Seriously, I had a stack of paper scraps that was approaching Leaning Tower proportions. I felt guilty every time I looked at it, knowing there were almost full sheets of cardstock being bent or bashed around the corners. I have a system for my cardstock that works perfectly for me - the problem? the system was WAY out of date! So I finally did myself a favor, pulled out the label maker and updated my filing system.


It took awhile. I hadn't updated it since BEFORE last years In Colours! With all the recent colour changes and additions I needed to prep quite a few folders. But, oh, just look at it now! All those gorgeous colours (this is one of four drawers) the scraps right where they belong, waiting to be used.

So that's my challenge to you. Identify the "problem area" or zone in your room, on your desk, or just in the cupboard you keep your supplies. Work out a solution - then DO IT! You'll feel SO much better, so inspired, and you may just find something you completely forgot you had!


This is how I store all those pretty little lengths of ribbon and trim that might otherwise sit tangled in a drawer, forgotten and unused. Pretty, functional, and it's easy to grab a ribbon or two for a project I'm working on.


Larger rolls of ribbon? Longer popsicle sticks and a hurricane vase! These storage solutions cost me nothing, I used things I had around the house already and most of my non Stampin' Up! ribbon is stored this way. I definitely use it more now I can see it.

If you have a fun organisation idea I'd love to hear it! Or, tell me YOUR hoarding horror stories so I feel better about mine!


October 16, 2010

Embellish!

Hi everyone! Today's OCC challenge is one we can all have fun with - embellishments! Diane has challenged us to use at least three embellishments on our creation.

My favourite embellishment is probably ribbon - it's rare I create without it. On this card I've also used Prima flowers - another hot favourite, Stickles, Glimmermist, Brads and Crystal Effects.
The Birthday Princess cutie has her dress paper pieced, the rest of the image is coloured with SU! Markers. I added Stickles to the crown then a layer of Crystal Effects over top and on the cake icing. The flowers were sprayed with Glimmermist and I added a Build-a-brad.

The banner, scalloped rectangle and jumbo scallops layer are all outlined simply with a Chocolate Chip marker - I just hold it on its side to get the even lines.

Head on over to Our Creative Corner to see the wonderful design team creations - I hope you'll embellish along with us!

(if you're in North America, don't forget to leave a comment on this post for your chance to win a $45 gift voucher!)


Paper & Card: Riding Hood Red, Chocolate Chip, Very Vanilla
Ink:
Riding Hood Red, Assorted for Sponging and Colouring
Other:
Ruby Red Brads, Build-a-Brad, Crystal Effects, Chocolate Chip Ribbon

Stamps: Birthday Princess - MFT Stamps
Paper & Card:
Marrakesh - Basic Grey
Other: Jumbo Scallops Dienamic - MFT, Jamara Embossing Folder, Prima Flowers, Glimmermist, Gold Stickles