


 Hi everyone! First off - Happy 26th Anniversary to my Mum and Dad!
This tutorial is a long time coming! Not that it took a long time to create - just an afternoon (three weeks ago!) You see, there was a....technical....problem. The light was awful for the finished object photos that night, and, well, Shanan and I may have eaten the props while we watched a DVD!
I created this basket specifically to hold Cadbury Creme Eggs. I've found Creme Eggs are a love/hate product - either you adore them, or think they're just awful! If you're in the awful camp, this basket will also hold any small chocolate eggs, painted eggs, or lots of other trinkets. At the end of the post I'll show you another version perfect for a small gift - think bath bombs, small lotion bottles - anything really!
Right, on we go!
 To create the basket you'll need a 7 1/2" piece of cardstock. Score every side at 2".
 Punch around all sides using the Eyelet Border Punch. TIP: Line your punch up with the middle segment - using the score lines as a guide, this way your corners will match up nicely later.
 Cut between score lines as shown in the photo.
 Trim 1/4" or so from the newly created "flaps" of your box. This prevents the punched edges overlapping and looking messy when the box is put together.
 Using a strong adhesive like Tombow or Sticky Strip, adhere your flaps to the inside of your box.
 Adhere strips of Designer Paper around the outside of your box. My strips were 1 3/4" wide. Don't worry, we'll cover that gap!
 Adhere strips also 1 3/4" wide inside the box. Overlap these ones so there's no gap showing.
 Cut a strip of cardstock 2" by 11". You can leave this plain, or scallop both edges and add a strip of paper as I did.
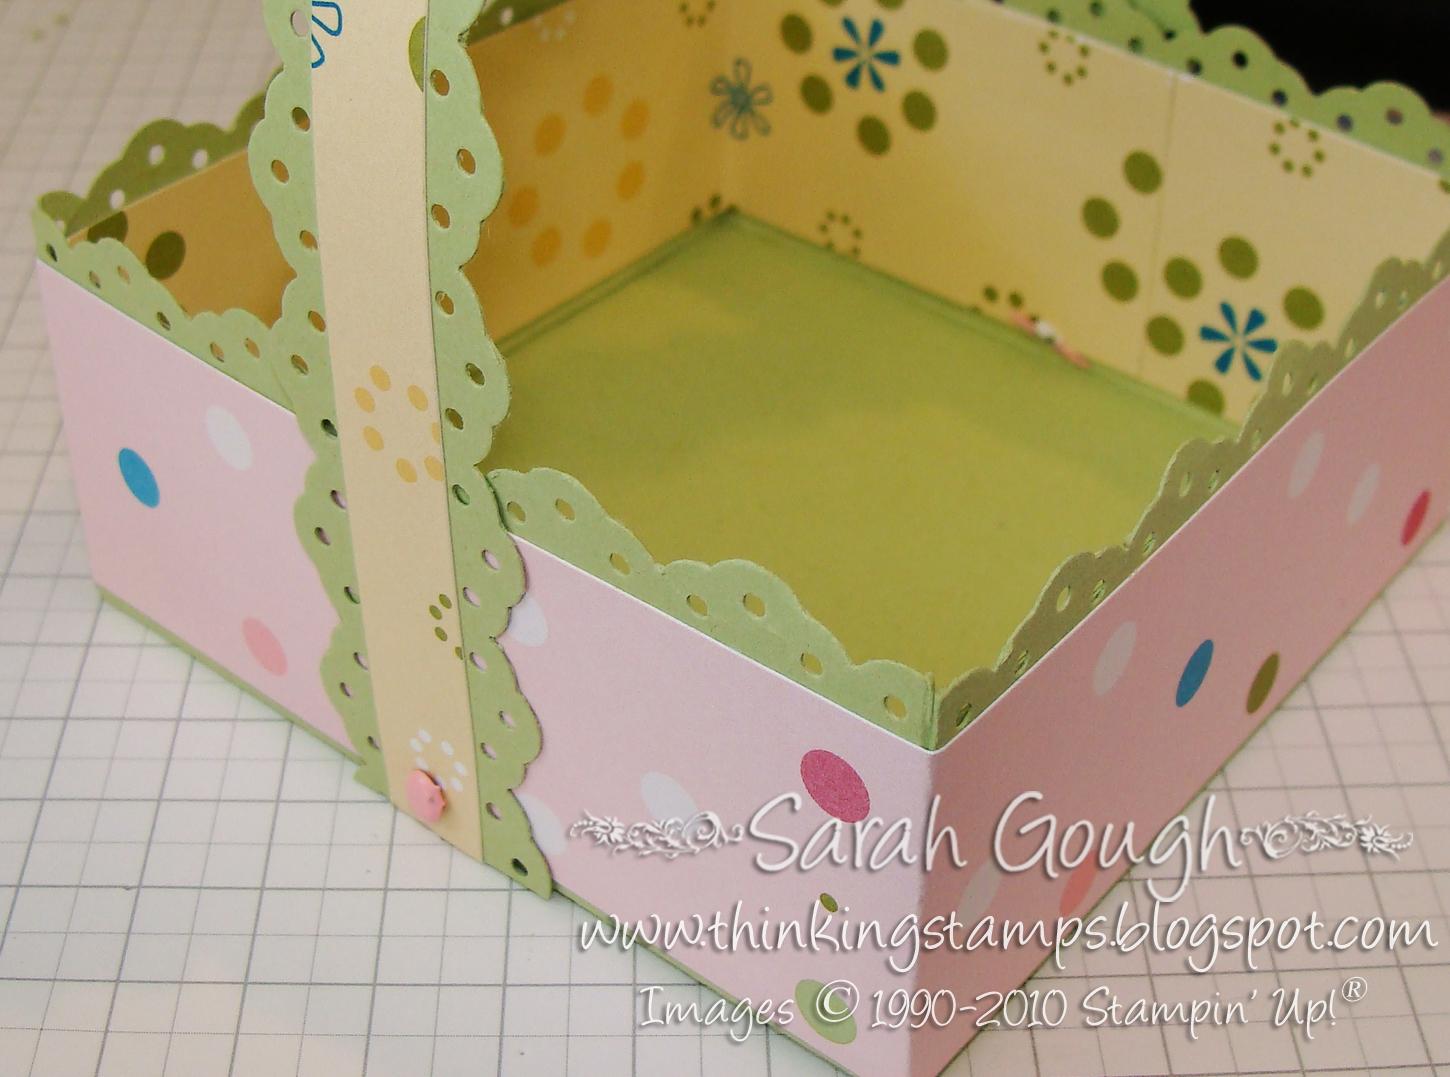 Adhere the handle to your basket, covering any joins in your paper. I used adhesive at the bottom of the handle, and a little near the top of the side of the basket to keep it steady.
Add a brad if you wish. The easiest way to do this is make a pencil mark, then pierce with a needle or piercing tool while your basket is sitting flat on the desk - this avoids transferring too much pressure and creasing the sides of your basket.
Now it's time to create the insert.
 Cut a 5" square piece of cardstock and score each side at 3/4". Cut the corners off as shown.
 Adhere a 3 1/4" square piece of paper to the insert.
 Flip the insert over, and using a ruler and pencil, draw diaginal lines between the corners. Mark each line at 1 1/4" from the corner. Using a 1 3/8" Circle Punch, punch four circles, centering your pencil marks in the window of the punch. This gives us a nice even layout.
 Your insert should look something like this. Score the sides and apply a little adhesive before putting the insert in your basket. You could make the sides of the insert longer so it stands inside the basket without needing adhesive - but I wanted to be able to see the paper inside the basket once the eggs are removed.
 That's it! Your basket is finished and ready to be decorated as you wish.
 I tied wide Vanilla Grosgrain around my basket and made a little tag using this cute image from Greetings Eight.
Don't have four creme eggs? (did your husband eat your props too?) How about a basket just for one...or for a fancy soap or bath bomb?
 Here's a version you could use all through the year. The construction is exactly the same - just start with a 6 1/2" square base, score at 2". For the insert, use a 3" square piece of cardstock and score at 1/2".
 Want that pretty border around the nesting space for your egg? Punch a 1 3/8" circle out of cardstock, then punch around the hole with the 1 3/4" punch. Instant frame!
I hope you'll make your own baskets - please leave me a comment if you enjoyed the tutorial and feel free to link your creations, I'd love to see them!


Stamps: Greetings Eight, Occasional Greetings
Punches: 1 3/8" Circle, 1 3/4" Circle, Butterfly, Small & Large Tag, Eyelet Border
Other: Clear Buttons, Watercolour Wonder Crayons, Eyelets, Linen Thread


