January 31, 2013

Kick off your boots...


Yeehaw! Welcome back for another day of MFT teasers. Like many of the MFT design team, I've been following along with the online Clean and Simple Card Making 2 class, and my card today uses a sketch from the first day of class. The stamp set I've used today is Western Sentiments, this month's Triple Scoop set. It pairs SO well with some existing MFT products!

I stamped the woodgrain image from Western Backgrounds in Kraft ink on Sweet Tooth cardstock. I used Circle STAX to cut my window, and stamped the main sentiment in Wild Cherry ink. The second sentiment is stamped on a Fishtail Flag STAX.

The boots are little charms from Country Charms, I've snipped off the top loop and highlighted the embossed line with a white gel pen.


Inside my card I've used the cool new Barbed Wire Fence Die-namics. I love that woodgrain embossed into the fence posts!

Here are the wonderful My Favorite Things goodies I've used today:


Here are the new goodies available later this month:


Here are the details about the upcoming release:
  • You can attend the New Release Party on February 4 from 8-10 PM EST HERE in the MFT forum, where you can WIN PRIZES!
  • The MFT release, including all new stamp sets and Die-namics, is on February 4 at 10 PM EST.  You'll find all the newest products HERE at release time.
  • The guest designer contest is going on now!  Check out the forum for details on how YOU can win over $200 in stamp sets and Die-namics.
  • If you'd like to see all the teasers for today, please click on over to the MFT Blog NOW.  Be sure to leave comments as you go for the chance to win one of 2, $10 gift certificates given away daily.  The winners will be posted on February 4 just before the release party, on the MFT blog.

 
Stamps: Western Backgrounds, Western Sentiments (MFT Stamps)  Ink: Premium Dye Ink in Kraft, Wild Cherry (MFT Stamps)  Dies: MFT Die-namics - Country Charms, Circle STAX, Fishtail Flags STAX, Barbed Wire Fence (MFT Stamps)

January 30, 2013

Right This Way


Today the MFT team are previewing Laina's two newest sets - yay! I've used Right This Way to create a pillow box with a "secret" message.

Do you get it? When I first read the "you'll find me here" stamp, I thought "in your heart". So, this reads, "you'll find me here, in your heart". Goofy things amuse me, I tell ya!

I started my box by cutting out the Square Pillow Box and stamping two of the arrow images in Black Licorice ink. Some of the arrows are stamped *very* slightly off kilter (on purpose! lol) which gives added movement to the background.

The heart was cut with a Heart STAX and if you look closely, it was stamped all over with a small arrow.


The little flower is from Embellished Eggs, previewed yesterday.

The letters from By the Letter and the arrow from Lead The Way Die-namics got a coat of black enamel for a super glossy look. Black Rhinestones finish it all off.


I love the tone on tone look of the rhinestones over the enamel paint.

Here are the wonderful My Favorite Things goodies I've used today:


Here are the new goodies available later this month:


Here are the details about the upcoming release:
  • You can attend the New Release Party on February 4 from 8-10 PM EST HERE in the MFT forum, where you can WIN PRIZES!
  • The MFT release, including all new stamp sets and Die-namics, is on February 4 at 10 PM EST.  You'll find all the newest products HERE at release time.
  • The guest designer contest is going on now!  Check out the forum for details on how YOU can win over $200 in stamp sets and Die-namics.
  • If you'd like to see all the teasers for today, please click on over to the MFT Blog NOW.  Be sure to leave comments as you go for the chance to win one of 2, $10 gift certificates given away daily.  The winners will be posted on February 4 just before the release party, on the MFT blog.

 
Stamps: Right This Way, Embellished Eggs (MFT Stamps) Ink: Premium Dye Ink in Black Licorice, Wild Cherry, Kraft (MFT Stamps)  Dies: MFT Die-namics - Pillow Box, Lead The Way, Easter Elements, Heart STAX (MFT Stamps) Other: Black Enamel Paint (Ranger) Rhinestones

January 29, 2013

Embellished Eggs


It's day one of February teasers for My Favorite Things and spring is in the air! Today I have a card and a NEW giftbox Die-namic to show you using Lisa's newest sets!

 
I've created a pocket as my focal point for this card using the new Insert It - 3x4 Pocket Die-namics. The backgrounds are stamped using the Spring Backgrounds set and all the other elements are from Embellished Eggs.


Inside my card pocket I've slipped a lollipop as an Easter treat that can be easily mailed!


I just love that adorable little bird!


Inside my card I've used lots of the cute Easter Elements Die-namic shapes.


I made a matching Cone Treat box to go with my card today - I am in love with the new treat box options MFT are offering!


For the Cone Treat Box, I masked each section and stamped the Spring Backgrounds to give each side a different look. As with the card, all elements are sponged with Kraft ink.

Here are the other sides... I also used Sno Cone ink on these projects as well as the new colours.


The new inks releasing this month are just perfect for Easter projects!

Here are the wonderful My Favorite Things goodies I've used today:


Here are the new goodies available later this month:


Here are the details about the upcoming release:
  • You can attend the New Release Party on February 4 from 8-10 PM EST HERE in the MFT forum, where you can WIN PRIZES!
  • The MFT release, including all new stamp sets and Die-namics, is on February 4 at 10 PM EST.  You'll find all the newest products HERE at release time.
  • The guest designer contest is going on now!  Check out the forum for details on how YOU can win over $200 in stamp sets and Die-namics.
  • If you'd like to see all the teasers for today, please click on over to the MFT Blog NOW.  Be sure to leave comments as you go for the chance to win one of 2, $10 gift certificates given away daily.  The winners will be posted on February 4 just before the release party, on the MFT blog.

 
Stamps: Spring Backgrounds, Embellished Eggs (MFT Stamps) Ink: Premium Dye Ink in Sno Cone, Kraft, Grape Jelly, Pink Lemonade, Sour Apple (MFT Stamps)  Dies: MFT Die-namics - 3x4 Pocket, Easter Elements, Cone Treat Box (MFT Stamps) Other:  MFT Ribbon - Grape Jelly

January 22, 2013

Creative Challenge - Circle STAX Box and Card


The MFT Design Team Creative Challenge is a monthly feature, where we are challenged to explore our creative side using a specific theme, product, or technique. This month, we were challenged to create with our Circle STAX.  Be sure to check out the MFT Blog for a list of all participating designers who have a project to share with you today. 

For this month's challenge, I've used both sizes of Circle STAX to create an easy gift box and matching card.

This box is easy to make in any size you like - using all the different sizes of Circle STAX! Read on, I'll post a tutorial at the end of this post.


For my flowers today, I've used felt and the Royal Roses Die-namics, as well as the new Mini Hybrid Heirloom Rose.


I tied twine around my ribbon handle to create a faux pleated detail. I've decorated my items with white Liquid Pearls for a fun polka dot detail.


I've let the Leaf Filled Flourish hang over the sides of the lid of my box.

The same flourish overhangs the window I cut in the center of my card. I've trimmed away a small part of the flourish to allow it to frame the sentiment. Don't be afraid to alter your Die-namic cut pieces, the results can be fun!


The sentiment on the inside of my card is popped up on foam. I've also adhered a piece of white cardstock behind the window, cut with a slightly smaller circle to create a nice border.


I've used the same patterned paper on the inside of my card so it will show through the window.


The lid of the giftbox is constructed in the same way as the base of the box. A short squat box would look fantastic as a mini hat box!

Here are the wonderful My Favorite Things goodies I've used today:


Here's how to make my circular gift box. Experiment with different lengths of cardstock, as well as different depths for a completely different look! Click on the photos for a closer look!

I started with a piece of cardstock, 11" by 4.5"


Score each side at 1/2"


Cut small triangles as shown to create little tabs. These will form the base of the box.


Adhere red line tape to each tab.


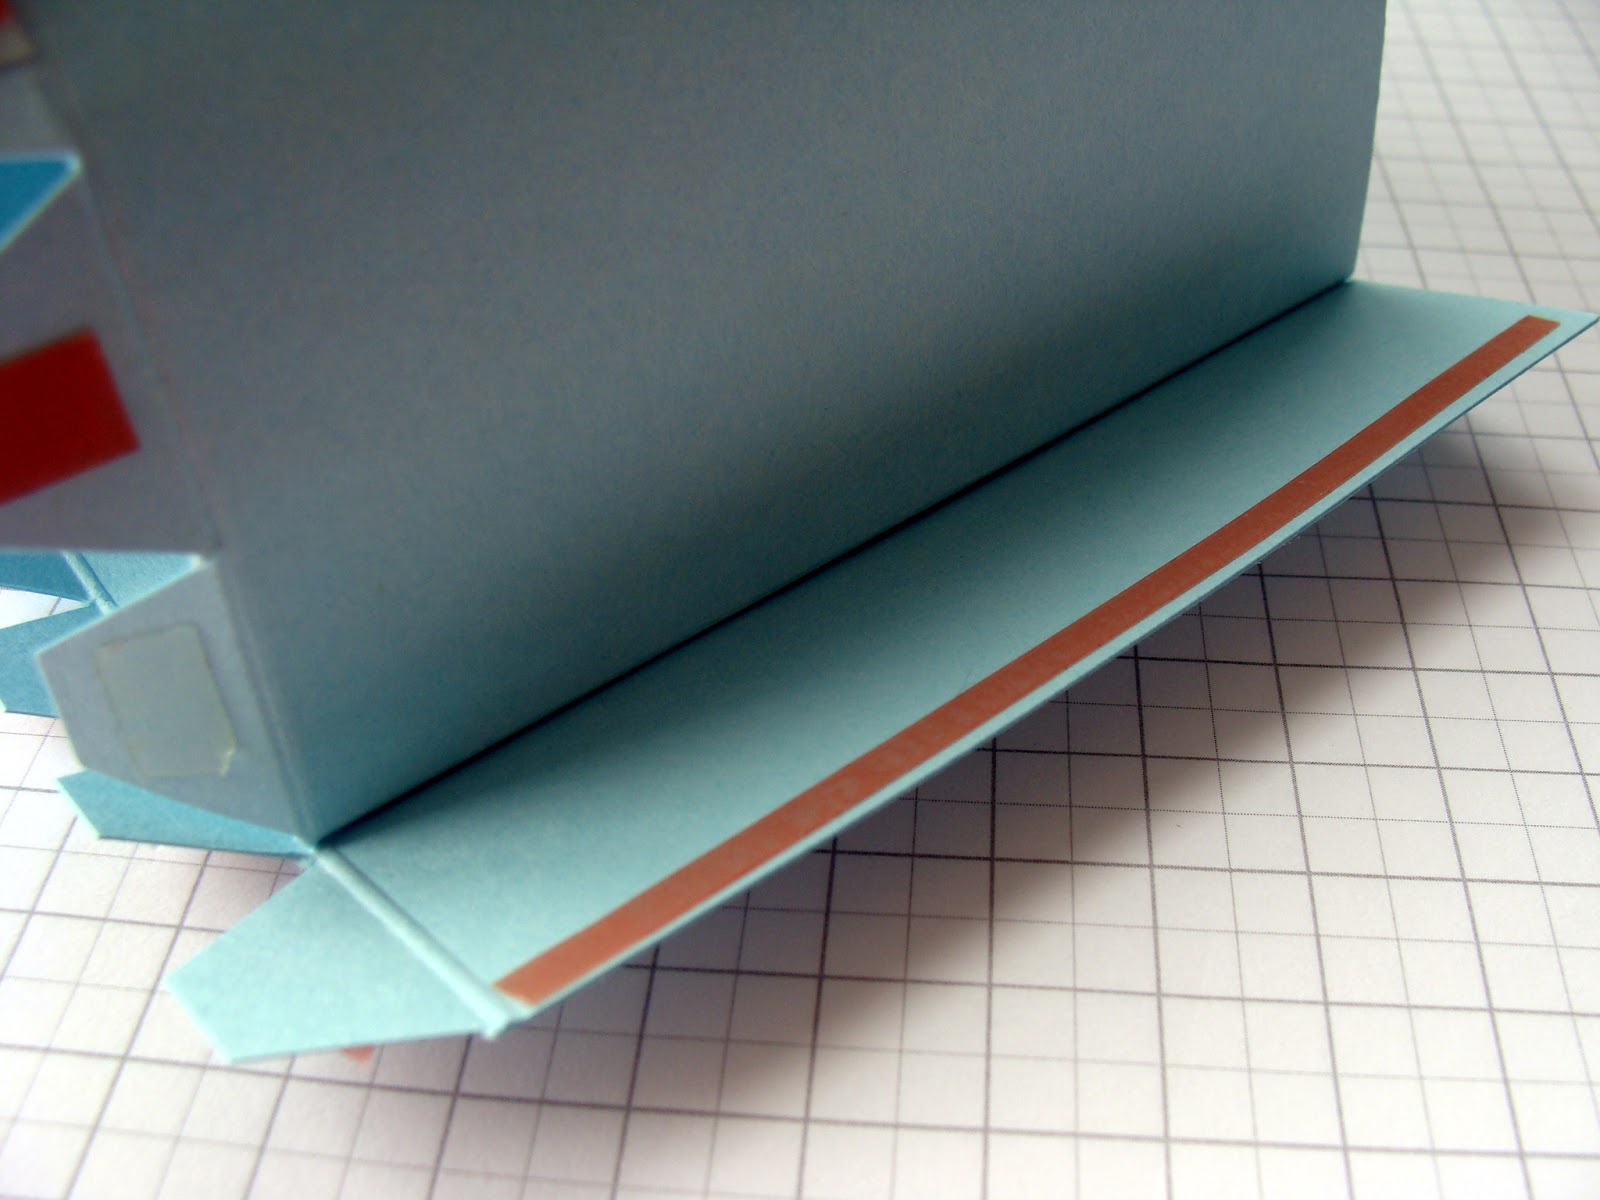
Curve your cardstock to create a cylinder. Adhere the tab a small way inside the box, if you do it on the edge, you'll end up with a tear drop shape.


Use tape to finish forming the cylinder. Don't worry if you get a crease or two in your box, you can cover them with paper when decorating!


Curve the small tabs inward.


Use an appropriate sized Circle STAX to cut the base for your box.


Center your box on the base. I layered on a second colour for added interest and strength.


To create the box lid, repeat the steps with a second piece of cardstock the same length, and whatever depth you desire.


Wrap the lid piece around the box when adhering the side tab to make sure it will slide on and off easily.


Adhere an appropriate sized circle to finish the box lid. It's time to decorate!


I used ribbon to attach a handle to my box.


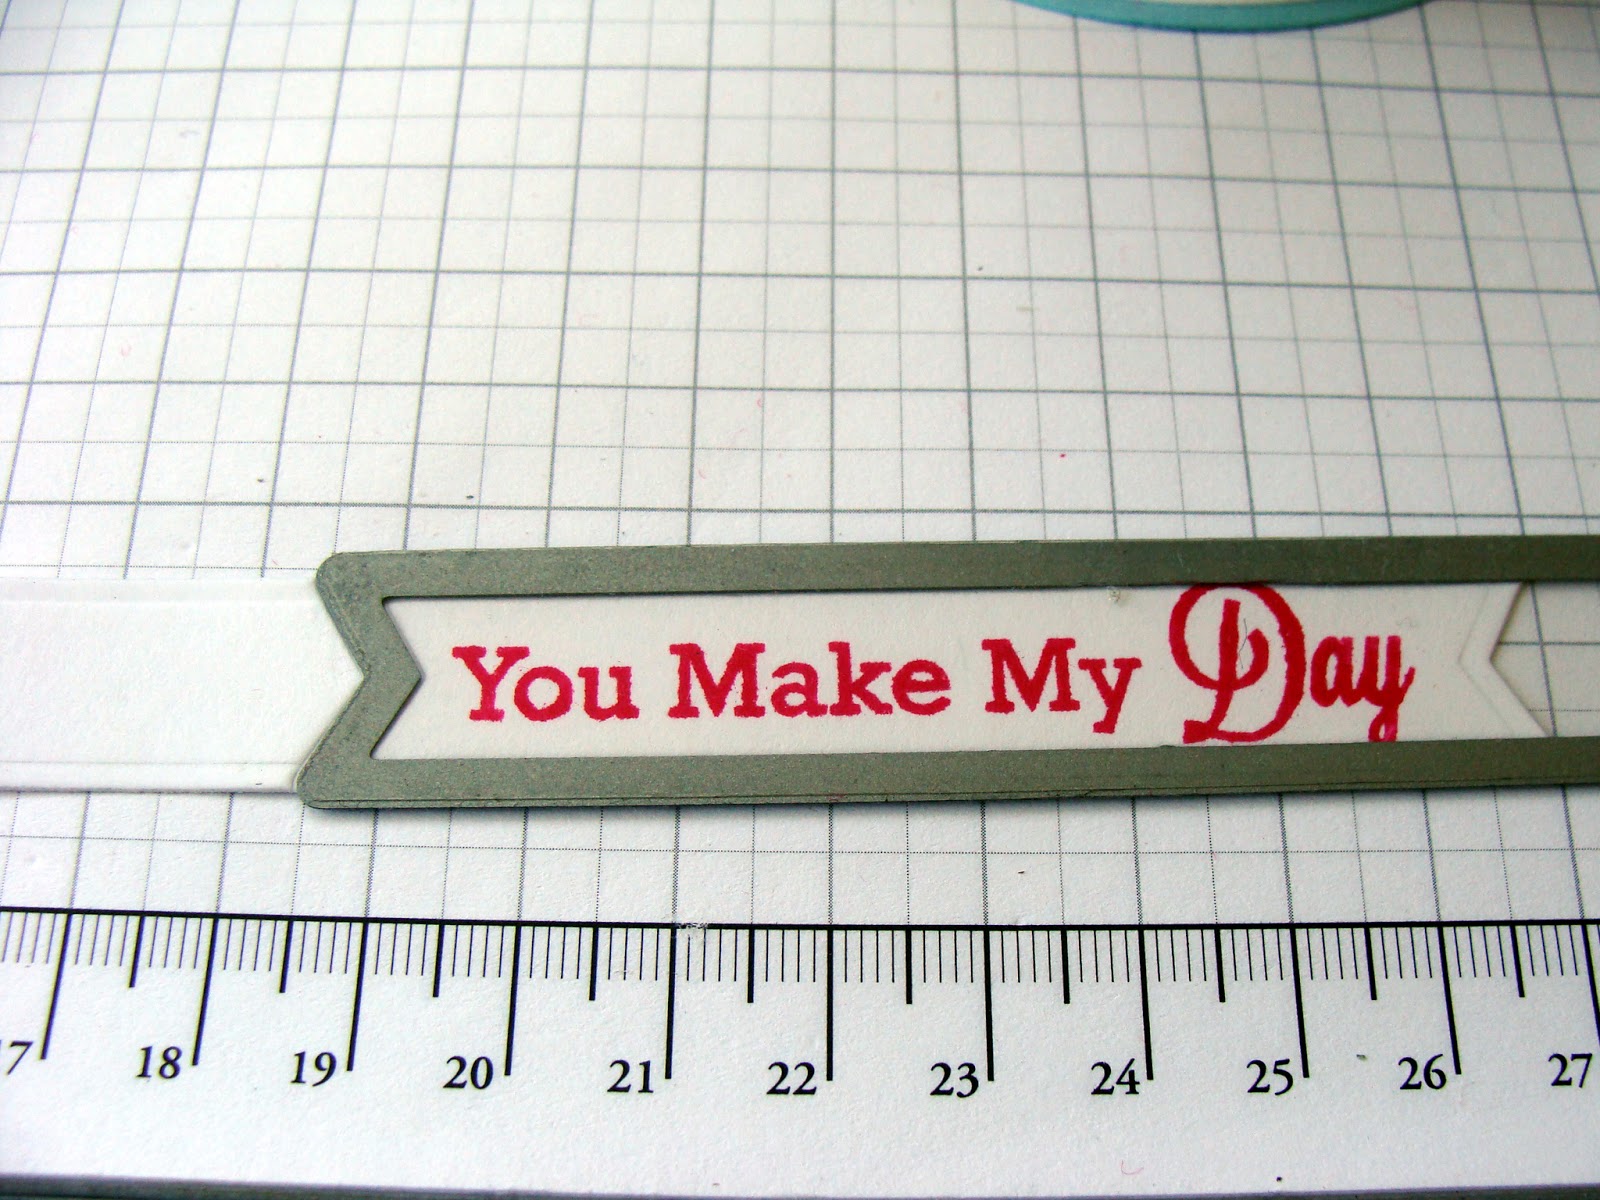
To get the embossed edge all the way around your sentiment piece, cut with a Fishtail Flag STAX, stamp your sentiment, then lay the piece back inside the Die-namic before cutting again.


You'll end up with a perfectly embossed and centered piece! Thanks for visiting today!
 
Stamps: You Make My Day (MFT Stamps) Paper: Pretty Party (Crate Paper) Ink: Premium Dye Ink in Razzleberry (MFT Stamps)  Dies: MFT Die-namics - Layered Heart Border, Circle STAX, Fishtail Flags, Mini Royal Roses, Large Royal Rose, Mini Hybrid Heirloom Rose, Leaf Filled Flourish (MFT Stamps) Other: MFT Felt - Sno Cone, Razzleberry; MFT Ribbon - Razzleberry; Twine, Cord Brads, Liquid Pearls