Hi everyone, I thought it was about time we had another Technique Spotlight post! I know I have a wide range of visitors, so this technique might be new to you, or it could be an old favourite, but hopefully it's inspiring either way!
Cracked Glass is a great way to use those embossing supplies that might not get as much use as they did when you first started stamping. I always say Versamark ink and clear embossing powder are must-have supplies, and this is another reason why!
The technique is simple. Stamp and colour your image. Ink the entire image with your Versamark pad, sprinkle over embossing powder and heat. Repeat 3 or 4 times - I like to repeat the layers of embossing until you see a lot of liquid movement when heating. Then pop the entire thing in the freezer for a minute, it will come out warped - and that's when it's time to get cracking! You can crack your image as much, or as little as you like.
 You can, after cracking your image, buff over it with ink to make the cracks show more. I haven't on this card as I went with a lot of cracking, but on cards where I've had a more subtle effect, I have inked. There's a fantastic tutorial on Cracked Glass at SCS that shows the extra step.
Ok...so here's the finished product....
 I always seem to go with floral images when I'm doing this technique, they just work so well. I have used a Kraft card base for the C4C31 challenge, and the sketch is from the awesome Karen Giron. The colour combo is Kraft, Very Vanilla, Baja Breeze, Mellow Moss and Soft Sky. I have embossed over the sentiment layer to tie it into the cracked layer. I've used the Circle Scissor Plus to cut all the circles.
 I wanted a simple, vintage feel, so kept the edges of my card free of sponging, and instead distressed a little. The inside images are stamped with Sahara Sand which I love using with Kraft.
I've added a new label to my posts - from now on, cards using 100% Stampin' Up! product (retired or current) will be labeled with "SUO" (Stampin' Up! Only) so you can find them easily.


Stamps: Soft Summer, Circle of Friendship, Sweet Little Sentiments
Paper & Card: Kraft, Very Vanilla, Baja Breeze card
Le Jardin Designer Paper
Ink: Soft Sky, Baja Breeze, Sahara Sand, Versamark
Other: Circle Scissor Plus, Heat Tool, Clear Embossing Powder, Cutter Kit, Mellow Moss Taffeta Ribbon, Piercing Tool, SAMJ




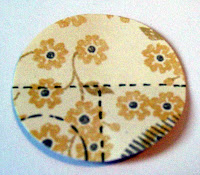
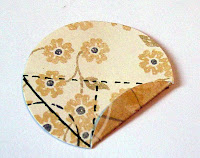 This part is a little tricky, but you'll soon get used to it. Make a fold from the two points where your creases meet the outer edge of the circle. The solid line on the left of the circle is where you should fold, the right side has been folded already.


 Your image will look like this. All that remains is to gently heat the image once again, just to set the powder. Then I like to take a stiff bristled paintbrush, and brush quite vigorously over my image. This gets rid of any stray particles of glitter.