


 I'm back and finally stamping! My husband and I spent the long weekend at the Armageddon Expo in Christchurch with our store, Action Figures Online. It was a great weekend, but tiring - and I didn't get to stamp at all Thursday-Monday! The good news is, when I got home last night, all my goodies that had arrived last week and hadn't even been opened were waiting for me!
I love the Polka Dots and Paisley stamp set and the matching paper is gorgeous! I knew I wanted to use both this morning, and this is what I came up with. Here's the step by step:
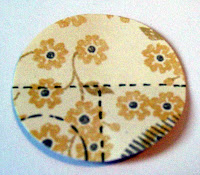
- Stamp the paisley image on scraps of patterned paper and card stock. This is a great way to use up all those little pieces of card you may have lying around. If you're anything like me, you keep every tiny scrap - you never know when it might be useful!
- Cut out the three different parts of the image from all your different colours. Layer them together in different ways then glue together with the 2 Way Glue Pen. This is called Paper Piecing and it can give you lots of great looks with your stamps.
- Stamp the sentiment in Old Olive on your square of Whisper White card stock. This was in my scrap bin too, my white layer measures 4" square.
- Punch a hole using the 3/16" handheld punch in the middle of the "o" in joy. Attach a silver brad through the hole.
- Pierce a border around the layer using the Mat Pack. I used the second line of holes for this border.
- Tie a piece of Old Olive Wide Grosgrain around the layer, then attach to an Old Olive card base with Stampin' Dimensionals. Using Dimensionals helps to accommodate the back of the brad and the ribbon.
- Attach your paper pieced paisleys (try saying that three times fast!) in any pattern that looks good to you. Use Dimensionals to give one or two some height.
- Trim your ribbon ends and you're done!
I hope everyone had a safe and fun long weekend. I'm off to tackle all the unpacking and the mess we made before we left on Thursday!
Happy Stampin'
Sarah
Stampin' Supplies:
Polka Dots & Paisley stamp set.
Old Olive, Pretty in Pink, So Saffron and Petals and Paisley Designer Paper scraps.
Old Olive and Basic Black ink.
Old Olive Wide Grosgrain ribbon.
Silver Brad.
3/16" Handheld punch.
SNAIL adhesive.
2 Way Glue Pen.
Stampin' Dimensionals.
Mat Pack and Piercing Tool from the Crafter's Tool Kit.
Paper Snips.
All supplies available from Stampin' Up!


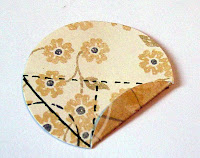 This part is a little tricky, but you'll soon get used to it. Make a fold from the two points where your creases meet the outer edge of the circle. The solid line on the left of the circle is where you should fold, the right side has been folded already.


 Your image will look like this. All that remains is to gently heat the image once again, just to set the powder. Then I like to take a stiff bristled paintbrush, and brush quite vigorously over my image. This gets rid of any stray particles of glitter.


