May 20, 2009

A Very Special Influence

Hi everyone,

I hope you'll forgive a different kind of blog post from me, I promise to keep it short!

On Friday evening, my Grandma passed away surrounded by family, after a courageous battle with cancer. Of course I've spent the last few days in a bit of a daze, but I've also spent a lot of happy time thinking about her and everything she meant to me. I thought I'd share a little of that with you.

I really think a lot of my creativity can be traced back to my Grandma. I distinctly remember her sitting me down and teaching me lots of different embroidery stitches on a piece of linen. Grandma showed me how to combine satin stitch, and chain stitches, and a multitude of others to create flowers and other decorations. She also showed me how to sew a button, and even how to darn! I've long loved Cross Stitch (it was my biggest crafty obsession before stamping!) and I think this has a lot to do with Grandma, as well as things my Nana and Mum showed me.

I also love jewellery making. I love beads, and anything shiny and pretty really! When I was younger, I could spend hours going through Grandma's stash of buttons, sorting by colour, or type - only to put them all back in a jumble. When I discovered beading, Grandma would often give me an old necklace of hers, or something she'd picked up in a second hand store for me to take apart and use.

Of course, I love paper craft - and Grandma always appreciated the time and effort put into a card or other project. It wasn't unusual to see a card I'd made her on the sideboard months after the fact - and I loved seeing the amazing creations her friends would make her too.

Of course, my Grandma taught me a lot of other things. How to bake - especially how to make piklets on her iron griddle, and although I have her recipe (she'd make them from heart) mine will never be the puffy delights hers were! I remember her showing me how to draw - or at least, trying. I still can't draw a straight line, but I can remember every detail of the wee sketch she showed me explaining perspective and depth. I used to draw that same scene over and over!

Grandma never raised her voice, loved to give little presents, always had lollies in her jar for going home with, gave the best hugs, and somehow made butter and vegemite on toast the most delicious thing you'd ever tasted! She will be missed greatly, but I know that as I have over the last few days, I will always think of her as I use my hands to create something beautiful - and will smile and thank her for her very special influence.

May 13, 2009

Breaking all the Rules!

The fashion rules that is! Don't mix stripes and polka dots? Red and pink clash? - not today!

I was SO excited to see Pun Fun in the new catalogue, it's a set I've been dying for ever since I first saw American demos getting it inky. The wee animals are so cute, and are great for colouring or paper piecing like I have with the adorable hippo.

The colour combo for this card is Riding Hood Red, Pink Pirouette and Close to Cocoa.
Don't you love that scalloped border? That's the new Eyelet Border punch, which I'm loving at the moment. The papers are all from the Candy Lane pack. I covered a piece of Whisper White card with the paper I wanted, stamped the hippo twice, cut out the entire image the first time, and just the head the second. Why did I back it with Whisper White first? Just for added stability as I knew I'd pop the hippo up off her background.

The sentiment was stamped separately and punched out with the Word Window punch. I used my 1/16" Handheld punch to create holes in the scalloped circle to mimic the eyelet border. The trick I use to get these even is to go around first with my piercing tool, then use the punch over top.

I made another card using the adorable skunk from Pun Fun last night, I'll share that later in the week.


Stampin Supplies:
Stamp Set: Pun Fun
Ink: Stazon Black
Card stock: Very Vanilla, Riding Hood Red, Close to Cocoa
Paper: Candy Lane
Punches: Eyelet Border, Word Window, 3/16" Corner Rounder, 1/16" Handheld, 1/4" Circle (retired), Scallop Circle, 1-3/8" Circle
Accessories: White Gel Pen, Pretty in Pink Grosgrain Ribbon, Vintage Pewter Brads, Stampin’ Dimensionals, SNAIL adhesive.
All supplies available from Stampin' Up!

May 12, 2009

Raspberry Daisy

Happy Tuesday all! Over the weekend I did lots of stamping, so have a few things to share over the coming week. I made this card for a bright and bubbly friend, I'm just loving the new papers, especially these from the Raspberry Tart pack!

The colour combo for this card is Kiwi Kiss, Rose Red and Very Vanilla.
I inked the large flower image from Upsy Daisy using a blender pen and drop of Kiwi Kiss reinker and a Rose Red marker. Now - I'll admit, cutting this out took some time, but I love the way it looks!

The label from the Cute and Curly set (this comes in a bundle with the coordinating punch) was also inked with a marker, so I could omit the sentiment. Instead, I used a sentiment from one of my favourite new hostess sets, Best Yet. I inked this in Kiwi Kiss and used the stamp-a-ma-jig to get the placement right. A bit of sponging around the label and it was done.

I LOVE this new curly label punch! I also wanted to show you how I shaped the layer my curly label is sitting on....
Take a strip of cardstock, and holding your punch upside down, insert it into the punch. Once you punch you'll end up with this....
You can try this with lots of your punches to get shaped ends on strips of cardstock. Just another reason to love your punches!

Happy Stampin'


Stampin Supplies:
Stamp Set: Upsy Daisy, Cute & Curly, Best Yet (hostess)
Ink: Kiwi Kiss, Rose Red
Card stock: Rose Red, Very Vanilla
Paper: Raspberry Tart
Punches: Scallop Edge, Curly Label, 1/4" Circle (retired)
Accessories: Sponge Dauber, Blender Pen, Rich Regals Brads, Stampin’ Dimensionals, SNAIL adhesive.
All supplies available from Stampin' Up!

May 8, 2009

Bright Blooms

Hi everyone! Hope you've had a great week. It's been wet and cold here in Lower Hutt this week, great stamping weather. Here's a card I made last weekend, using some of the new In Colours for this year - which I LOVE! It's so nice to use these bold colours on grey days!
The image from Eastern Blooms was coloured with markers. Now, there are no markers in the In Colours, but this is easily resolved. Simply load a blender pen with a drop of ink refill in the colour you want, and you can use it as you would any marker - even directly on the rubber of your image! Make sure to huff a warm breath on the image before stamping to re moisten the ink.

The colour combo for this card is Kiwi Kiss, Tangerine Tango, Pacific Point and Summer Sun.

This image is easier to cut out than it looks, although I did accidentally cut around one flower, removing it from the image - can you see where? The sentiment is from Occasional Greetings, I love it, it's perfect to use for a card that could serve in many circumstances.
Here's the inside of this card, simply stamped with the colours used in the main image.

Have a great weekend, and Happy Mother's Day for Sunday!


Stampin Supplies:
Stamp Set: Eastern Blooms, Occasional Greetings
Ink: Versamark, Stazon, Kiwi Kiss, Tangerine Tango, Pacific Point, Summer Sun
Card stock: Whisper White, Tangerine Tango, Pacific Point, Summer Sun
Paper: Good Morning Sunshine
Punches: 1/4" Circle (retired), Scallop Edge
Accessories: Mat Pack, White Taffeta Ribbon, Vintage Brads, Stampin’ Dimensionals, SNAIL adhesive.
All supplies available from Stampin' Up!

May 4, 2009

Rustic Rooster

Happy Monday everyone! The start of a new week already, who wants to bet that May speeds by as fast as April did?! I had a great weekend, I sat and watched movies on my laptop as I stamped the hours away - bliss! So I have lots to show you, but some things must remain hidden until after certain days are past (don't forget Mother's Day is coming up!)

This is a card I whipped up on Saturday. As usual, I started with my focal image, and just went from there. So, meet Mr Rooster!
This cute wee guy is from a new Hostess set, Rustic Rooster. When I looked at all the level two sets this year, this is the one I liked best - because it was so different from anything else in my (substantial) stash. I also loved the background french text stamp in the set.

The colour combo for this card is the new Riding Hood Red, Old Olive and Bashful Blue. The card is pretty straight forward, the focal image was inked with a pad and two markers, the sentiment is from one of my favourite (and much used this weekend) sets, Occasional Greetings.
Here's the inside view. Don't you love that scroll image? It has a gorgeous texture and looks great as a border like this. I also stamped the postmark image a couple of times, masking it for added depth.

If you love this set, don't hesitate to email and find out how you can get it for free!

Hope your weekend was great too, only four more days till the next one!


Stampin Supplies:
Stamp Set: Rustic Rooster, Occasional Greetings
Ink: Stazon Black, Riding Hood Red, Old Olive, Chocolate Chip
Card stock: Riding hood Red, Old Olive, Whisper White
Paper: Summer Picnic (retired)
Punches: 1/4" Circle (retired) Scallop Border
Accessories: Markers, Black Gingham ribbon, Soft Subtles Brads, Stampin’ Dimensionals, SNAIL adhesive.
All supplies available from Stampin' Up!

April 29, 2009

Wonderful Mother

Hi all! Well it's been a wet day here for sure, after catching up on some work I spent a good while curled up on the couch with a book - the cats definitely appreciated being able to curl up in front of the heater!

Here's a simple Mother's Day card (no Mum - this isn't your one!) that I shared with a great bunch of ladies over the weekend. It was inspired by a card on page 111 of the current catalogue. I love the look of the spiral punch, but always forget to pull it out - I'll have to show it some more love!
We used two of my favourite sets for this one, Priceless and Wonderful Favourites. Everyone loved the different combinations for the sentiment that Wonderful Favourites provides - it's the perfect set for a cardmaker or scrapbooker (and you can't beat 23 stamps for $46.95!) Some ladies chose to make a card for their sisters, daughters or friends.

This card's about as simple as it looks, the Vanilla layer is up on dimensionals, as are the cut out butterflies. The pale plum squares were punched out with the 1 1/4" punch.

I used my quick cheat for the sentiment - just stamp it on an angle! No worrying about if it's straight or not, and it looks great with these curly fonts!
Hope you had a great Wednesday, only two more days till the weekend!


Stampin Supplies:
Stamp Set: Priceless, Wonderful Favourites
Ink: Perfect Plum
Card stock: Kraft, Perfect Plum, Pale Plum, Pink Pirouette, Very Vanilla
Punches: Corner Rounder, Spiral, 1 1/4" Square
Accessories: Mat Pack, Stampin’ Dimensionals, SNAIL adhesive.
All supplies available from Stampin' Up!

April 27, 2009

Gifted Inspiration


Hi everyone! Hope you had a wonderful weekend. I hadn't meant to go this long without blogging....but of course it completely slipped my mind that Shanan would have the camera with him during a trip to Sydney last week! All my plans of a creative few days with lots of photos went right out the window! Of course, there's always an upside to hubby going away - and this time it was a lovely gift....
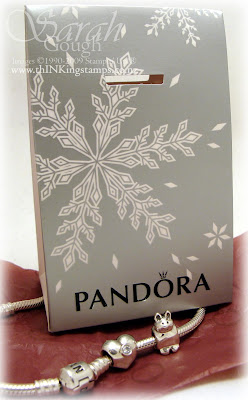
I've wanted a Pandora Bracelet for ages now, I was so excited to unwrap this at 1am on a Monday morning when his flight got in! But like any crafter, I was almost as excited about the cute wee box the bracelet came in as the bracelet itself! So here's my quick 10 minute take on the elegant Pandora box.
This is a really simple, modified 2-4-6-8 Box. (Half a sheet of A4 card, score at 2" along the long side, then turn and score at 2", 4", 6" and 8". Cut off the smallest rectangle tab, cut alongside the bottom tabs, then adhere) All I did was cut off the top of three of the sides of the box to create a fold over flap. Then just squish the sides in the get the milk carton shape. Really easy! I used the slot punch to create the ribbon holes.Here's the view from the back of the box. I kept the decoration on this one super simple. The flower image from Three Little Words was stamped randomly on Pink Pirouette with Baja Breeze ink. I stamped an extra flower on Whisper White, cut it out and attached it with dimensionals. The sentiment was cut out with the Word Window punch. Quick, simple and effective (I hope!)


Hope the weather is nice wherever you are - cold and dreary here in Lower Hutt today, perfect stamping weather!


Stampin Supplies:
Stamp Set: Three Little Words
Ink: Baja Breeze
Card stock: Pink Pirouette, Whisper White
Punches: Slot, Word Window
Accessories: White Grosgrain Ribbon, Stampin’ Dimensionals, SNAIL adhesive.
All supplies available from Stampin' Up!

April 13, 2009

Happy Easter!


Well, if you'd told me before Christmas, that I wouldn't be blogging again till Easter, I would have thought you mad! But here we are! Hi everyone - a bit late, but, Happy New Year!

So, where have I been? Well, the truth is very boring - I just haven't been stamping! Shocking right? I took the summer off, and other than dabbling a little, and a few small projects, I can't say I've spent much time in my stamp room at all. Instead I've been enjoying the lovely weather, spending time with friends and family, reading lots of good books and puttering around with a bit of beading and cross stitch.

Now that the weather is starting to cool, and we have a wonderful new Stampin' Up! catalogue for inspiration, I'm starting to feel like putting in some time with my beloved inks and stamps - finally!
I whipped up this wee mini 3x3" card this afternoon. The cute wee bunny is from a great new set, Greetings Eight. I coloured him using blender pens, and all the wonderful new In Colours from Stampin' Up! this year! Aren't they gorgeous? I love using blender pens for small images like this, the lovely pen tips make getting into those tight spots a breeze.

I'll hopefully have a few updates over the next couple of days, including a Beautiful Bundle with these gorgeous new colours. If you would like a copy of the new catalogue, feel free to email me to order your copy - or better yet, book a workshop to get one for free! I am all booked up for April (I could possibly squeeze in a weeknight workshop the last week if you're desperate!) but feel free to enquire about your date for May, or email to find out how you can earn hostess benefits from anywhere in New Zealand!

I hope you had a great Easter, that no one was stuck in traffic with hyper children on a sugar high, and that you've had a wonderful summer too! Thanks for all the emails and enquiries, they are much appreciated and it's great to be back in the stampin' swing of things!

Happy Stampin'


Stampin Supplies:
Stamp Set: Greetings Eight, Polka Dot Background
Ink: Pacific Point, Baja Breeze, Kiwi Kiss, Riding Hood Red, Pink Pirouette, Tangerine Tango, Stazon Black
Card stock: Whisper White, Baja Breeze, Kiwi Kiss, Pink Pirouette
Paper: Good Morning Sunshine
Punches: 1 3/8" Circle, 1 1/4" Circle, Scallop Edge
Accessories: Mat Pack, Blender Pens, Soft Subtles Brads, Sponge Daubers, Stampin’ Dimensionals, SNAIL adhesive.
All supplies available from Stampin' Up!

December 20, 2008

Merry Christmas Everyone!

Hi everyone,

Just a quick update - thank you all for your kind messages while I have been unwell and dealing with a family situation. Please forgive me if I don't get chance to write you all back personally, you've really been filling my inbox with love!

I will be spending the next few weeks with family and loved ones but hope to be back online early in the New Year with lots of fun projects for us all. I am taking bookings for January and as always, if you have an order feel free to email it through.

I haven't even had chance to make Christmas cards this year, but I hope you've all enjoyed creating special keepsakes for family and friends! May you and yours have a wonderful Christmas and a very Happy New Year. Stay safe and I can't wait to share all kinds of creative things together in 2009!!!

Best wishes,

October 7, 2008

Terrific Tens: Friend

Hi everyone! It's been a busy few days here, lots of prepping for classes and looking forward to SENZ this weekend in Wellington! If you're going, make sure you stop me and say Hi! (I'll be the one loaded down with shopping bags!)

Some Stampin' Up! news - to celebrate World Cardmaking Day (this past Saturday) all Simply Sent Kits are on sale until this Saturday with 20% off!!! You can find these on pages 12-14 of the 2008-2009 Idea Book and Catalogue and they make great presents for beginning or experienced stampers, as they contain everything you need to complete the cards, including exclusive stamp sets. Please email me to place an order or for more information.

Onto the card! I had lots of goodies that have been sitting untouched since they arrived, so thought it time to pull them out for an ultra quick ten minute card!

This is a really simple layout, I love highlighting our gorgeous papers and ribbon this way. It really was as simple as it looks, the sentiment from the For a Friend hostess set was stamped in Stazon, a little marker colouring, the image and scalloped strip are popped up on dimensionals and a gorgeous piece of Pumpkin Pie ribbon finishes it all off.

I bet you have a lot of stamps in your collection that would fantastic highlighted this way - I hope you'll try a simple card like this soon!


Stampin Supplies:
Stamp Set: For a Friend
Ink: Stazon
Card stock: Tempting Turquoise, Real Red, Whisper White
Paper: East Coast Prep
Punches: Slit punch
Accessories: Rich Regals Brads, Pumpkin Pie Striped Grosgrain, SU! Markers, Stampin’ Dimensionals, SNAIL adhesive.
All supplies available from Stampin' Up!

October 3, 2008

Cupcakes and Cards

Here's another card using one of the sale sets for this month - Big Bold Birthday! Cupcakes are everywhere in stamping lately - so to celebrate Stampin' Up!'s 20th birthday, what better way than to enjoy some cupcakes and stamp some too!
Here's a quick pic of the cupcakes I made for Wednesday nights gathering. Chocolate. Yum!
And here's the cupcake we stamped! All the images are from Big Bold Birthday - there are so many stamps in this set and they can be used in so many ways! The icing sprinkles were created by "kissing" the inked polka dot image onto the icing image before stamping, cutting out and popping up on dimensionals.

I love using my slit punch to create a scalloped edge for a card like this - it adds a real touch of whimsy to any project.

The supplies for this card are included in October's Beautiful Bundle - which I've just now posted. There are TWO stamp sets in the bundle this month - 25 stamps!!! Click here for all current bundles.

Happy Stampin' and have a wonderful weekend!


Stampin Supplies:
Stamp Set: Big Bold Birthday
Ink: Pretty in Pink, Versamark, Markers in Bordering Blue and So Saffron
Card stock: Pretty in Pink, Kraft, Very Vanilla
Paper: Petals and Paisleys
Punches: Designer Label, Slit and Large Oval punches
Accessories: Pretty in Pink Grosgrain ribbon, Markers, Stampin’ Dimensionals, SNAIL adhesive.
All supplies available from Stampin' Up!

September 29, 2008

Stylin' in Silver!

Of all the wonderful accessories I love to put on my cards and projects, Styled Silver Hodgepodge Hardware is probably my favourite. It's just so elegant and I'm a silver girl at heart - I've always loved Sterling Silver jewellery so this hodgepodge is perfect for me!

Because everyone should have the chance to use these gorgeous embellishments, but buying a full pack at $68.95 + postage just isn't always an option, I'm doing a share on this gorgeous kit.

For $14.80 (including postage) you'll receive:

~ 10 Label holders - 2 each of the Circle, Square, Rectangle, Beaded Oval and Beaded Designer Label shapes
~ 8 Cast Brads - 2 each of the 4 designs in the pack (these are big brads, not mini size!)
~ 2 Ribbon Sliders (flower shape)
~ 20 Styled Silver matching Brads, enough for all the label holders

The photo above shows the hardware each person in the share will receive (as well as something stamped by me!) If you would like two shares, the price is $28.60. Please email me to book your place in the share. Visa, Mastercard and Bank Deposit all accepted. First come, first served, Nationwide orders welcomed! (Demos are welcome too of course!)

I couldn't write about how much I love Styled Silver Hodgepodge without showing you a project, so here's a box I whipped up last night. The hardware really gives it that something extra special!

For all the instructions on making this box, please see here. I've used paper from the Spring Silhouettes pack (I'm embracing Wild Wasabi and loving it!) For instructions on constructing the Dahlia please see here.
Did you know our punches coordinate with the Hodgepodge perfectly? (you could cut the paper to size if you don't have the punch). I've punched the Designer Label from the Spring Silhouettes paper. The sentiment from Circle of Friendship was stamped in Wild Wasabi, then punched out with the 1" Circle punch. One of the cast brads in the pack fit perfectly in the center of the stamped image - It's so much fun layering embellishments like this!

Don't forget to email me if you'd like to grab some hardware at a great price! Today is also the last day to email me with your Free Wheelin' orders, if you've been thinking about grabbing one of these stamp sets don't miss out on your chance to receive the matching Jumbo Wheel FREE!

Have a fantastic day!


Stampin Supplies:
Stamp Set: Circle of Friendship
Ink: Wild Wasabi
Card stock: Wild Wasabi, Certainly Celery, Very Vanilla
Paper: Spring Silhouettes
Punches: Designer Label, 1" Circle, 1 3/8" Circle, Corner Rounder
Accessories: Styled Silver Hodgepodge Hardware, Certainly Celery Wide Grosgrain Ribbon, Stampin’ Dimensionals, SNAIL adhesive.
All supplies available from Stampin' Up! Please email me to place an order.

September 25, 2008

Magical Mini

Late last night, after cleaning up from my previous project (I'm doing so well at this now, it makes a big difference to how often I want to create!) I got the itch to stamp something! Well, I couldn't go to bed without indulging, so made this quick little mini. Good things really do come in small packages!
This is a love note card and envelope (available in packs of 20) I love this size, they are perfect for attaching to a box of choccies or some flowers. Mostly Flowers is a set I've looked at for a long time, but only just decided to grab a couple of weeks ago - I have to say, I love it! Also, a new big love for me is SU! White embossing powder! I added some to an order about a month ago, and there it has sat until last night. It's fantastic, not all clumpy like other white powders (which are now in the trash!) I've owned.

Really simple card: Stamp the Mostly Flowers image in Craft White or Versamark on Certainly Celery card. Emboss with white powder and punch with the 1 1/4" square. Layer on a 1 3/8" Square of Perfect Plum. Adhere a scrap of Certainly Celery prints paper to the card base, attach two Eyelets from the Soft Subtles pack. Pierce three rows using the mat pack template as a guide and tie on some wide grosgrain ribbon. All done!

Instead of stamping the sentiment on or in the card I've stamped it on the envelope, I like this kind of simple presentation for the mini cards sometimes. The sentiment is from Short & Sweet.

Have a great Thursday!


Stampin Supplies:
Stamp Set: Mostly Flowers, Short and Sweet
Ink: Perfect Plum, Versamark
Card stock: Certainly Celery, Perfect Plum
Paper: Certainly Celery Prints
Punches: 1/8" Handheld, 1 1/4" and 1 3/8" Square
Accessories: Mat Pack, Certainly Celery Wide Grosgrain, Soft Subtles eyelets, Crop-a-dile, Stampin’ Dimensionals, SNAIL adhesive.
All supplies available from Stampin' Up! Please email me to order.

September 22, 2008

My Stamp Room

Hi everyone! Hope your day is going great so far. Yesterday was a busy day here in the Gough house, we finally got around to our spring cleaning, which, even after being here for only three months was well overdue! Isn't it a great feeling when the place you live is all in order?

I love seeing photos of other peoples craft rooms or spaces. I've picked up a lot of ideas for my "dream room" that I'll have one day! There are some amazing custom designed spaces out there.

Because my room is currently as tidy as it ever gets, I thought now was a good time to share some photos! You won't see an all white masterpiece, but you will see my very functional "Stampin' Space on a Budget"! Shanan and I are currently renting, and we move reasonably often, so it didn't make sense to me to spend a lot of money on outfitting a room, not knowing what kind of space I'll have in the future. Plus, less money on furniture meant more money on supplies!

Overtime my room has been furnished almost entirely in kit set furniture from The Warehouse (a bit like Walmart for my international visitors!) and a couple of purpose designed pieces from Kmart. You'll also see almost everything is on the floor - landlords don't take kindly to rails and shelves screwed into the wall for punch and stamp storage! Watch out for those $10 bookcases you can pick up sometimes....I use quite a few of them in a couple of different ways! My room also features a couple of cat beds - if I don't have a place for my cats to sleep they inevitably end up in the middle of whatever I'm stamping...so the trade off of taking up space vs. happy kitties is worth it!

Happy Stampin'

September 20, 2008

Product Spotlight: Three For You Punch Box

Hi everyone, hope your weekend is going great so far! I thought it was about time I wrote the post I've been promising for a week now - highlighting my new favourite product...the Three For You Punch Box! (There's a special offer coming at the end of this post!)

Regular readers will know I'm punch mad - so much so, that this was the only punch I needed to complete my Stampin' Up! collection! Now that I have it, I'm kicking myself for waiting so long to get it. Here's why....

First, let's take a look at what you get in the box. Wait, let's talk about the box itself! I was SO surprised how large this box is! It's a really cute metal box with a clear lid and a silver hinge. The thing I like most about the box is the label comes on a sticker sheet in the inside - so if you want to use it for something else you don't even have to peel the label off first!

Inside is the Trio Flower Punch, the 9 piece Three for You stamp set and three Stampin' Spot inkpads in Basic Black, Wild Wasabi and Purely Pomegranate. All you need to start creating is some card stock, everything else is here!

The stamp set is wonderful - the first thing you need to know is the set is die cut! That means you don't have to trim your stamps before mounting them on the wood blocks. Love that. I also love that it features a mix of images and sentiments, as well as polka dots - my favourite background image at the moment. And of course, the flower images fit inside the punch perfectly as you'll see soon.

There's nothing like seeing a couple of projects to get the gist of a product, so here's a couple I whipped up last night. This is a card I've had in my head even before my punch box arrived - that's rare for me, I don't usually start with a plan, so I'm glad this turned out cute! One of my favourite things about Spring is Blossom Trees - they are just so beautiful. I thought the trio flower punch would make wonderful blossoms!

To make the blossoms, all I did was punch Blush Blossom and Pretty in Pink cardstock. I then "nicked" the edge of each blossom with the distressing tool from my cutter kit, but you could use scissors (be careful!) This starts to split the cardstock slightly, and because Stampin' Up! cardstock is such good quality, you can split each petal without ripping the cardstock. I just get my fingernail in between the layers then roll up the edge of the petal. I love the softly feathered effect this gives.

Once I had my flowers I stamped the branch image from the hostess set Spring Solitude repeatedly in Chocolate Chip ink. There are lots of stamp sets with images that would work as branches, or you could draw them freehand. I used SNAIL to adhere some of the flowers and a little piece of Stampin' Dimensional to raise others up.

A bit of piercing, some Spring Fling Designer Paper, Chocolate Chip Satin Ribbon and my card was done! Now, just to be sure I had achieved the blossom effect, I asked hubby what he thought it was - "one of those trees....a blossom tree" he said, so mission accomplished!This second card was a Terrific Ten - I made it in under 10 minutes. I used the Purely Pomegranate ink in the tin to stamp the polka dots on Whisper White. I also used the same ink to stamp the flowers - stamping onto scrap paper twice after inking to get the pale shade for the bold flowers. Because you stamp and punch three flowers at once it's super quick to make these little embellishments.

I used the slit punch to make the scalloped edge for the card base, stamped the sentiment, tied some ribbon and adhered everything with dimensionals - voila!

Are you in love with this kit yet?!? If you are, I better give you a special offer hadn't I? Because the only thing the box doesn't include is cardstock....purchase the Three For You Punch Box before October 31st from me for $109.95 including discounted postage, and choose any pack of A4 cardstock from the 48 regular colours or the 2008 In Colours for FREE! That's a $12.50 value!

Everything will be couriered to your door, no extra postage for rural customers! You're welcome to add other products to your order for the same postage price if wished. Please email me if you would like to take advantage of this offer. All payment methods accepted, including Visa and Mastercard.

Enjoy the rest of your weekend, hope the sun is shining where you are!

September 19, 2008

Organisation is Key!

Well, it's certainly been awhile since I've gone a week in between posts! I do have an excuse though - I've been reorganising. I realised I've been in a constant state of tidying for awhile now, it was time to completely resort, throw out and rehouse a lot of my stamping goodies! I was finding it impossible to create in the midst of the chaos that was my stamp room, so hopefully things will be back to normal now!

Because organising and the need for a tidy workspace was a big topic during the UStamp chat last night, I thought I'd show you a couple of the ways I keep my space tidy and my goodies at my finger tips!
The first is a wee project that is so fun to do, and so useful as well! This is my designer paper ring. Now, I have a confession to make - I have all the double sided papers in the catalogue! Who can blame me though, they are so gorgeous! But with such an abundance of paper, it was hard to remember what patterns I had (and the photos in the catty can't do these papers justice, they are so much more beautiful in real life!)

So I made this ring. It's really simple - the dividers are squares of Very Vanilla Card stock with the corners rounded. The stamped label is from the Totally Tabs set - I like that this design has three lines, I can mark any papers "retired" on the third line when I need too. You just stamp it, punch it out with the round tab punch and fold it over to make your tab. Love it!

I just punched out 6 scalloped circles for each paper pack, one from each different sheet. I used the Crop-a-dile to punch the holes, so I could do all of them at once - so much faster and easier than doing them one by one!
I also have one for all the card stock colours. For this one I chose a shade of yellow from each colour family for the dividers and tabs. It's so useful having these rings on my desk at all times, they take up very little space and I have all my colours right there for mixing and matching.

While we're talking about card stock, here's how I store mine...

I have some cheapee file cabinets from Kmart that take A4 hanging files. Each colour has it's own folder, and I keep scraps in the front of the folder, full sheets at the back. I have four drawers, one for Soft Subtles and Rich Regals, one for Bold Brights and Earth Elements, one for Neutrals and specialty card and one for In Colours, current and retired.

I made labels from each colour card and I've got them stored in catalogue order (my card stock is probably the most well organised thing in this room!) My label maker is instrumental in keeping everything in it's place, as you 'll see here....

These are my sponge daubers. I love these little guys! They are in a drawer beside my ink pads - and I use my label maker on the smallest setting to label each one with a colour as I first use it. The "waiting to be used" ones are in the bag at the back.

You can have one sponge dauber for each overall colour - one for pinks, reds, blues etc - but over time your colours will start to get muddy when you sponge, not a good look! I won't have a dauber for every colour - if it's one I think I'll rarely sponge with I just use a wedge of Stampin' Sponge. But for my most used colours, I wouldn't be without these!

While we're talking about rearranging things....I was wondering...am I the only person that saves the "greenery" from wilted bouquets and uses it to make a new arrangment? I like making flowers last longer this way, and often with the gorgeous "fillers" in bouquets today you can make something just as pretty. This is the leftovers from my birthday flowers from my family and Shanan, I don't know what those feathery looking things are...but I love them!

I'll have more organisation tips and photos of how I keep my stampin' stash stored (try saying that five times fast!) for you soon. For now, dinner is in the crockpot simmering away (picture me at 7am this morning, tears streaming down my face from cutting onions!) and I have the whole day to stamp! I haven't forgotten my new fav mystery product promise, details soon!